1. Before you can proceed with the installation you must get the following information:
- Spot beam colour for your location
- Elevation Angle the dish needs to be set to
- Azimuth degrees to know in which direction the dish should be pointing
All this information can be found at the following website or by using the iPhone App. (You can get the iPhone app on the iTunes store by searching apps under Tooway, its free.)
http://finder.tooway-instal.com/fixe/pages/index.html
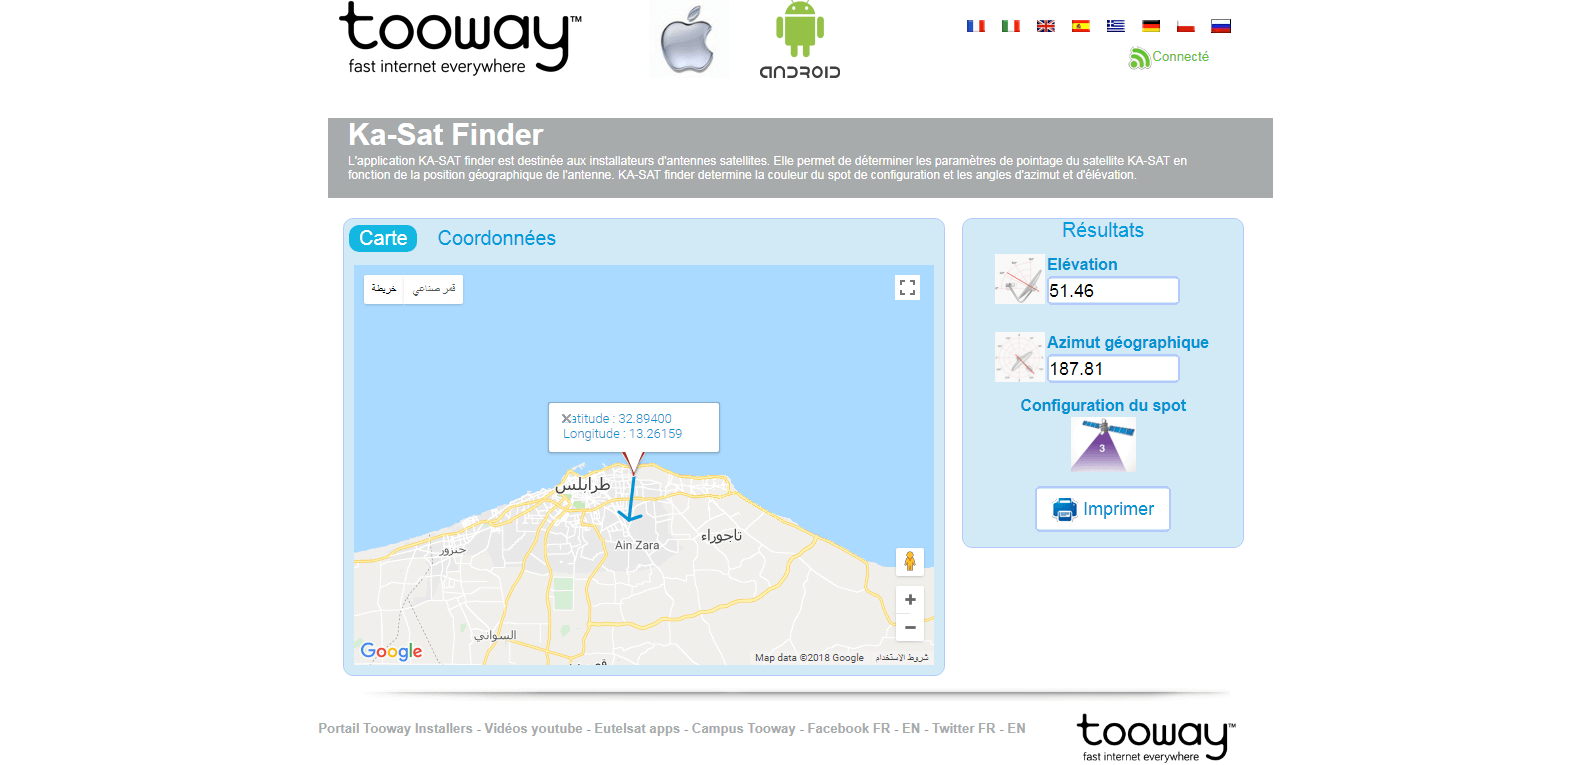
If at this point you have no internet access you can call the Europasat office and one of our friendly staff members will be able to check this information for you.
Indicated on this website we have inserted our office location and the following information was provided:
- Elevation 29.88
- Azimuth 167.08
- Spot Beam Colour: No2 Orange
2. Assemble and mount the Tooway Satellite dish as per the instructions in the box.
Wall bracket must be perfectly upright/vertical, use a spirit level.
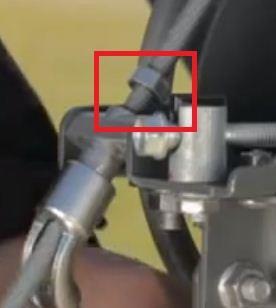
3. Once step 1 is completed attach the single coax cable to the TRIA. The TRIA has two ports, however only one is needed. Connect the coax cable to the TX port, as per the image below.
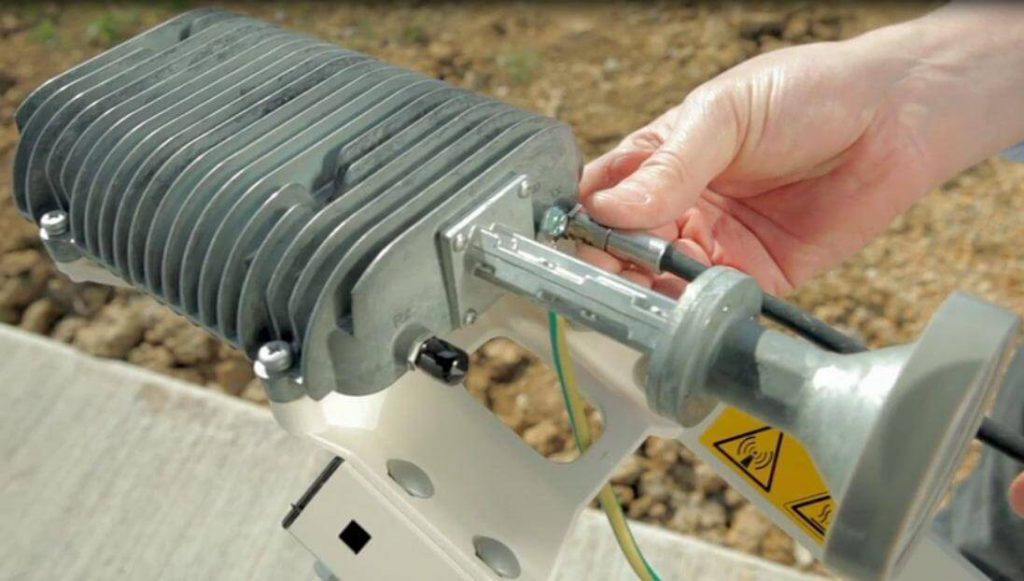
This cable is called the Inter Facility Link (IFL) in the diagrams below. Leave the black rubber grommet on the RX port to keep out any moisture.
4. Once the IFL is connected to the TRIA, connect the other end to the Tooway satellite modem.
Make sure the Tooway modem is NOT powered.
5. Confirm that your computer is set up for DHCP.
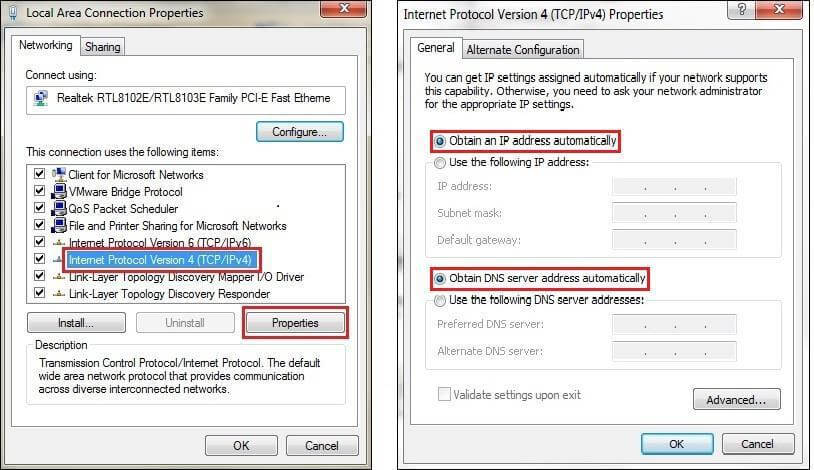
Not sure if your computer is setup for DHCP, please refer to our guide “Checking if your computer is setup for DHCP” in the back of this manual.
Please complete the following steps before continuing.
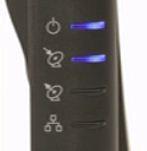
- Power up the Tooway modem by connecting the power cable. Four blue lights will light up once Tooway modem is powered.
- Connect the Ethernet cable to the modem and to your PC once modem has booted up.
- It is crucial before attempting any further steps to make sure step 4 has been completed.
For any Browser actions to be performed, we recommend either Google Chrome or Firefox.
7. Open your preferred browser and in the URL bar type in 192.168.100.1 as shown below.

At this point the modem should have the top power light on steady and the second light down will be flashing once every second.
NB: If you notice four lights flashing simultaneously please contact RLTT Customer Service on +218 (0)21 366 0201.
8. Once step 6 is completed the basic status page will be displayed as shown below:
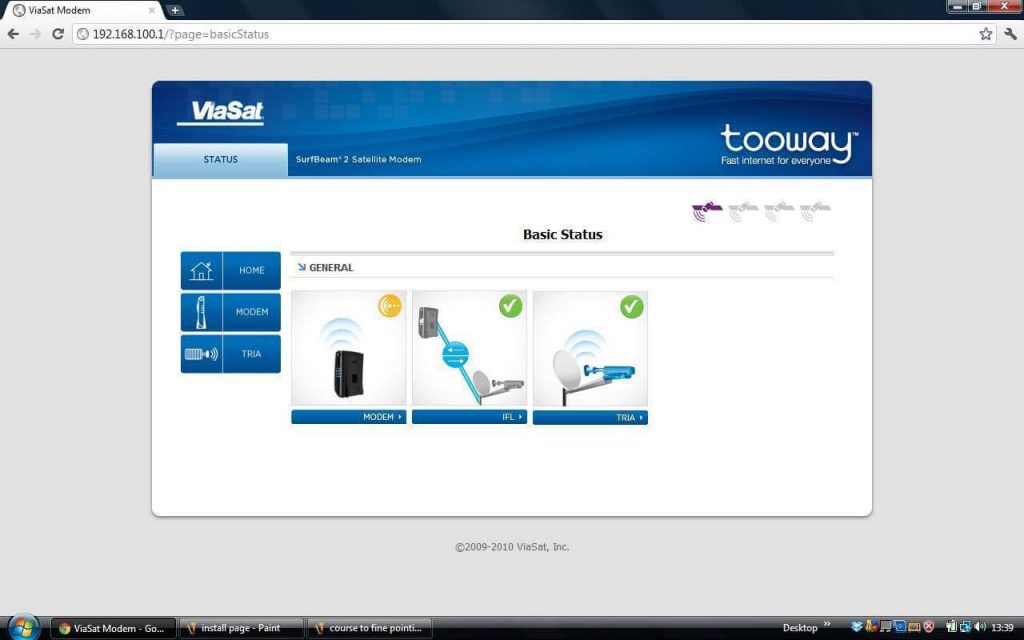
The Orange icon in the modem section indicates that it’s not online.
The IFL and TRIA should have green ticks next to them to indicate that the Tooway modem can communicate with them, and that the dish is ready to be pointed.
Troubleshooting
If the IFL has a red exclamation mark next to it, it’s indicating that there’s a fault with the cable or with one of the F type end plugs. Please ensure the cable is connected on both ends correctly.
Check the connections and the cable and reboot the modem. If the TRIA has a red exclamation mark on it, click on the TRIA logo on the page, it will tell you what the problem is. Please call us if this happens on RLTT Customer Service +218 (0)21 366 0201.
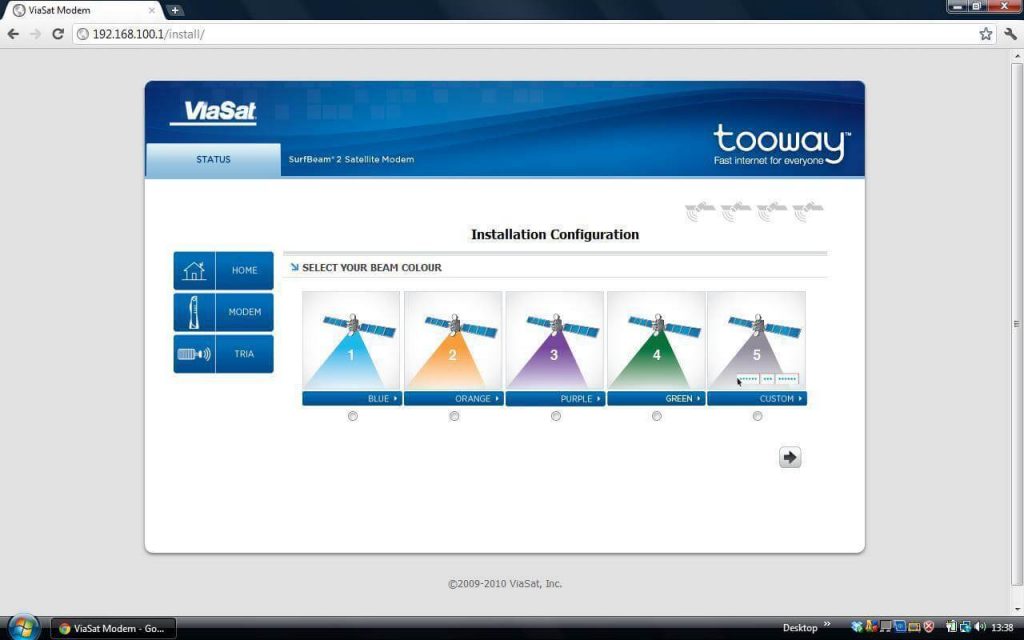
9. Once you have confirmed that the dish is ready to point, you need to browse to another part of the modem to select the correct satellite beam for your modem to use:
192.168.100.1/install
This page will ask you to select a beam colour. We will select Orange Beam 2 we got from step 1. Once you have selected the correct colour for your location click on the right arrow key.
You will then be directed to the “Coarse to fine pointing” page as shown below:
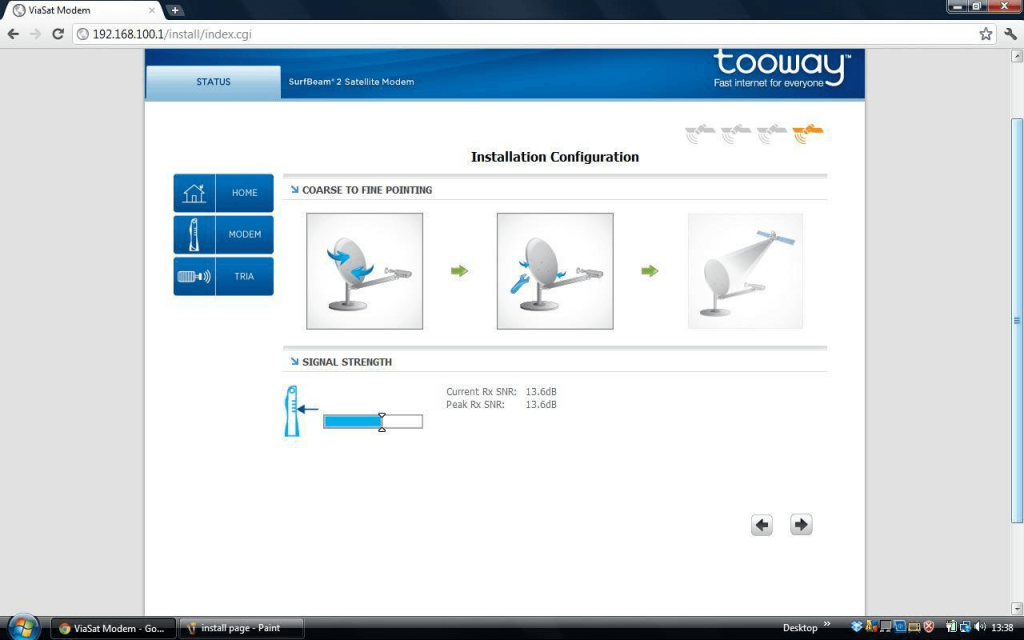
10. When you have accessed this page the beeper on the TRIA will have activated, it is now time to point the dish. Set the elevation to the suggested degrees, we will set to 30° as suggested in step 1.
Mid Pole Antenna
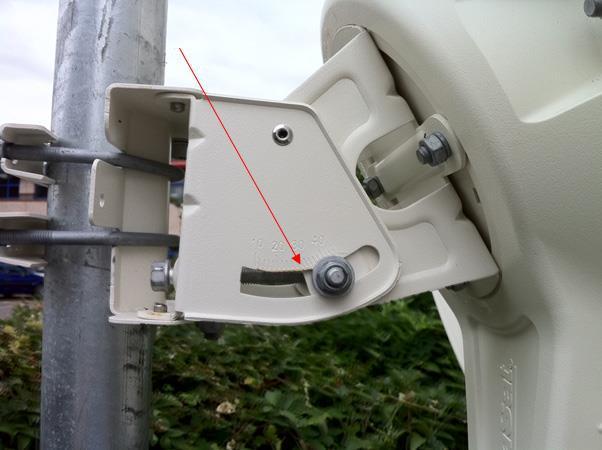
The elevation is read from the piece of metal to the left of the bolt and NOT the center of the bolt itself. For this scale to be accurate the wall bracket the dish is mounted on, must be absolutely vertical.
Once the elevation is correctly set as shown in step 10, move the dish in a general southern direction. If you have a compass you can use the Azimuth in Step 1 as a reference, but this is not necessary for the installation.
Also make sure the 4 bolts holding the dish in place on the wall bracket are still loose enough for you to be able to move the dish horizontally for the manual pointing.
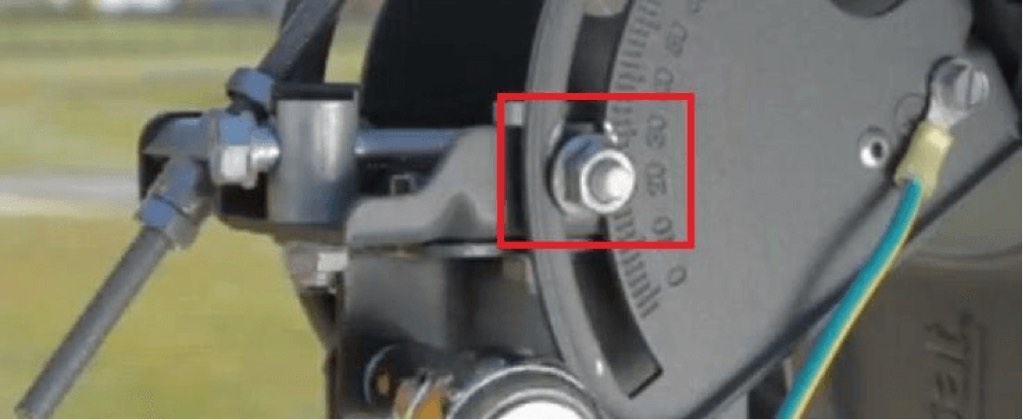
Top Pole Antenna

The elevation is read from the metal end as displayed in the picture and NOT the center of the bolt itself. For this scale to be accurate the wall bracket the dish is mounted on, must be absolutely vertical. (Check this with a spirit level)
Once the elevation is correctly set as shown in step 10, move the dish in a general southern direction. If you have a compass you can use the Azimuth in Step 1 as a reference, but this is not necessary for the installation.
Also make sure the 6 bolts holding the dish in place on the wall bracket are still loose enough for you to be able to move the dish horizontally for the manual pointing.
11. Pointing Procedure for Mid Pole Antenna (For Top Pole Antenna continue to step 14):
-
- Move the dish horizontally from left to right and right to left to pick up the signal from the satellite. When the dish is not receiving any signal, you will hear a “BEEP BEEP” every 3-4 seconds.
- The TRIA will ring twice (like a telephone) when it has initially started to receive signal. You will also notice a change in the beeping sound.
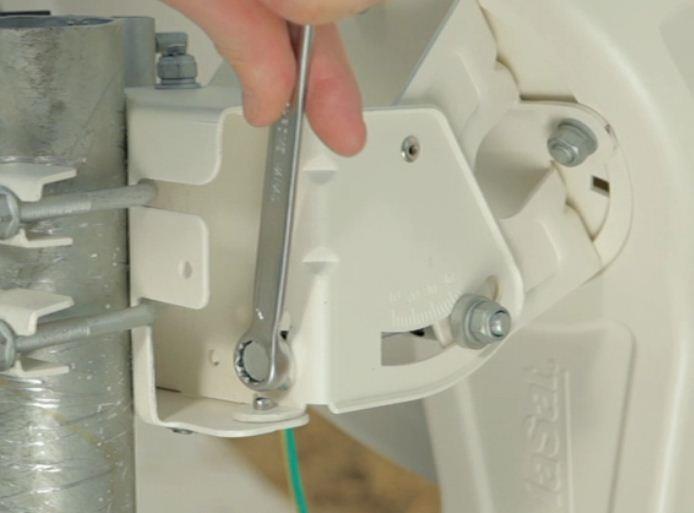
- Once you have heard the change in tones, tighten the 4 bolts on the back of the dish holding it to the wall bracket as shown below: (Make sure there is no drop in the tone)
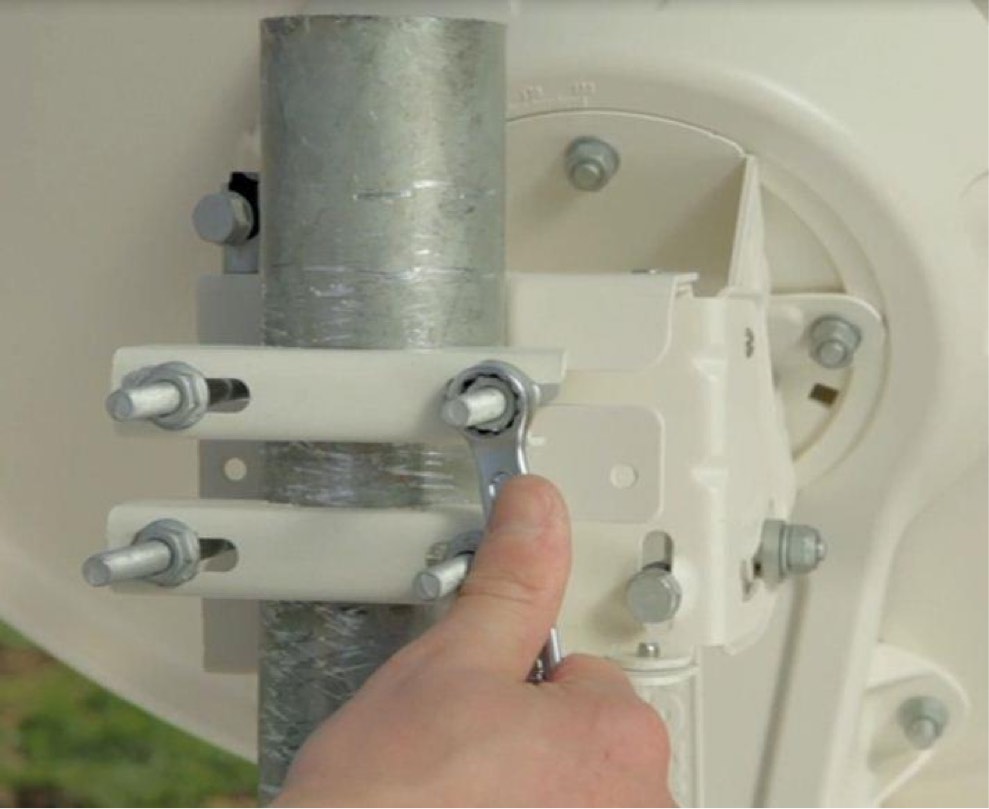
If you scan the sky left to right and do not pick up a signal, move the elevation up/down by 1 degree and repeat the horizontal scanning. Repeat this process until you have found the satellite.
12. Fine Pointing Procedure (Azimuth):
- First fine tune the azimuth (horizontal movement). Make sure the top and bottom bolts on the mount are both loose as shown below:
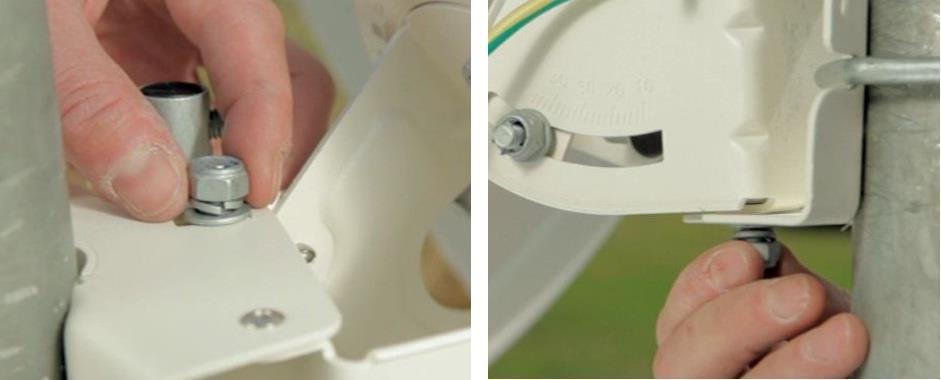
Start by moving the dish in one direction, if you hear the tone dropping, stop and move the dish in the opposite direction until the tone increases to a higher pitched tone, continue until the tone drops again, then stop and go back the opposite direction until best highest possible tone is achieved.
13. Fine Pointing Procedure (Elevation)
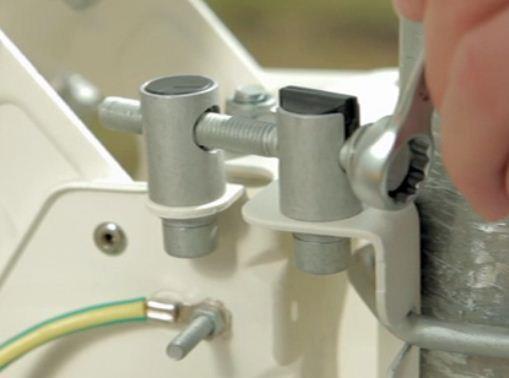
Make sure the side bolts for the elevation movement are both loose as shown below:
Start by moving the dish in one direction, if you hear the tone dropping, stop and move the dish in the opposite direction until the tone increases to a higher pitched tone, continue until the tone drops again, then stop and go back the opposite direction until best highest possible tone is achieved.
Once the elevation adjustment is completed with the highest possible tone, lock both side bolts.
When the best possible tone is achieved it may only last for a minute or so and then return to fast beeping, this is normal.
14. Pointing Procedure for Top Pole Antenna (For Mid Pole Antenna page back to step 11):
Move the dish horizontally from left to right and right to left to pick up the signal from the satellite. When the dish is not receiving any signal, you will hear a “BEEP BEEP” every 3-4 seconds.
The TRIA will ring twice (like a telephone) when is has initially started to receive signal. You will also notice a change in the beeping sound.
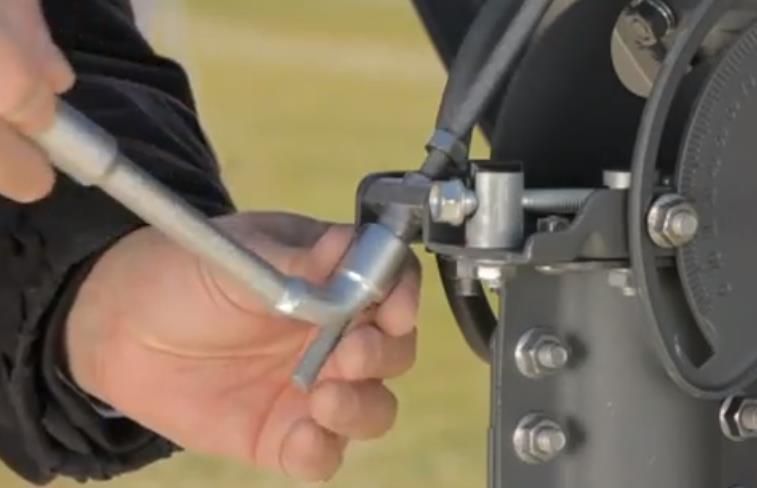
Once you have heard the change in tones, tighten the 6 bolts on the canister of the dish holding it to the wall bracket as shown below: (Make sure there is no drop in the tone)
If you scan the sky left to right and do not pick up a signal, move the elevation up/down by 1 degree and repeat the horizontal scanning. Repeat this process until you have found the satellite.
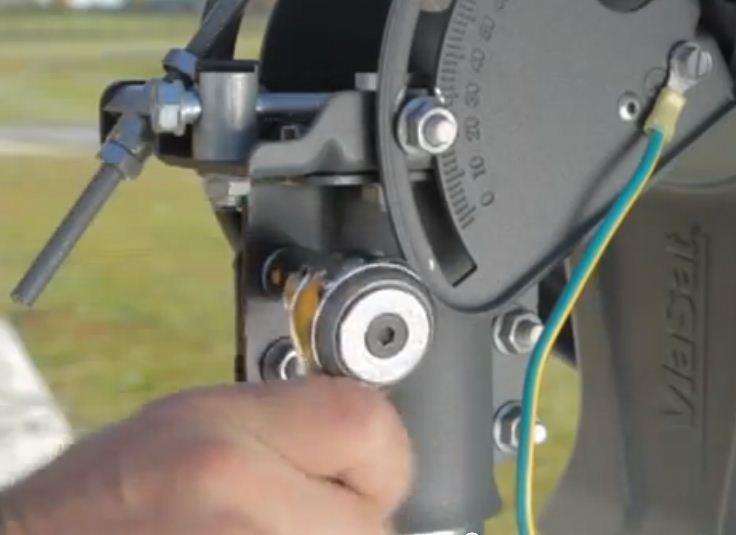
15. Fine Pointing Procedure (Azimuth):
First fine tune the azimuth (horizontal movement). Make sure the 4 bolts on the mount are loose as shown below: Please refer to the Top mount video if unsure.
Start by moving the dish in one direction, if you hear the tone dropping, stop and move the dish in the opposite direction until the tone increases to a higher pitched tone, continue until the tone drops again, then stop and go back the opposite direction until best highest possible tone is achieved.
Once the azimuth adjustment is completed with the highest possible tone is achieved, lock the 4 bolts holding the azimuth in place.
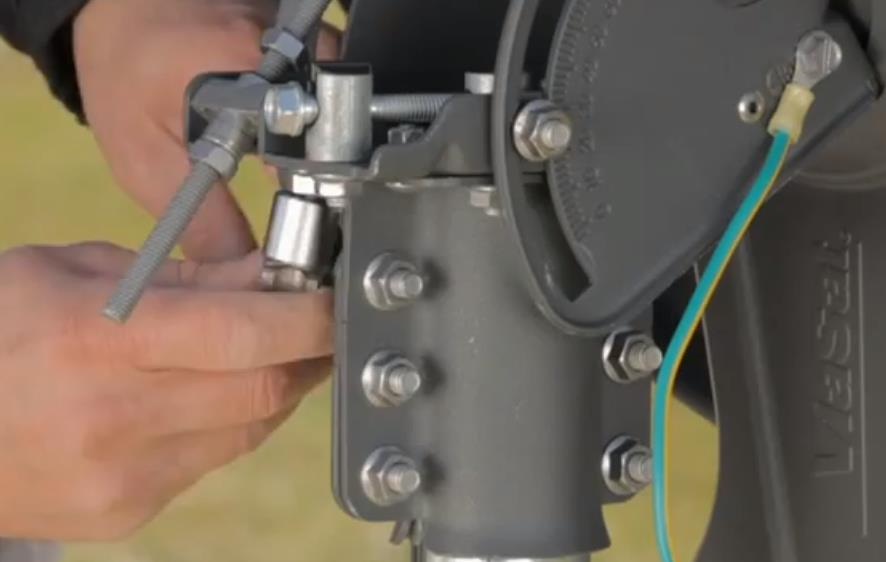
16. Fine Pointing Procedure (Elevation)
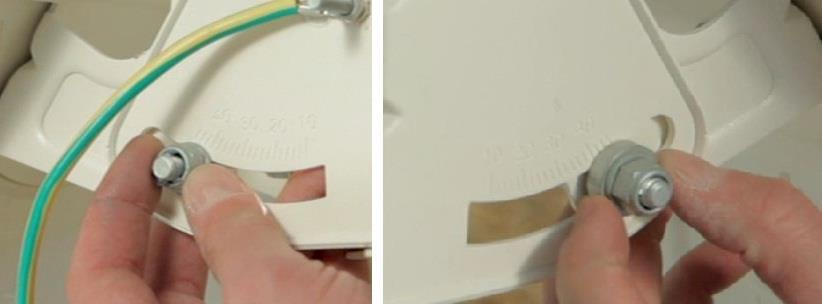
Make sure the side bolts for the elevation movement are both loose as shown below:
Loosen the top nut on the elevation arm.
Start by moving the dish in one direction, if you hear the tone dropping, stop and move the dish in the opposite direction until the tone increases to a higher pitched tone, continue until the tone drops again, then stop and go back the opposite direction until best highest possible tone is achieved.
Once the elevation adjustment is completed with the highest possible tone, lock down the top nut on the elevation arm and both side bolts.
When the best possible tone is achieved it may only last for a minute or so and then return to fast beeping, this is normal.
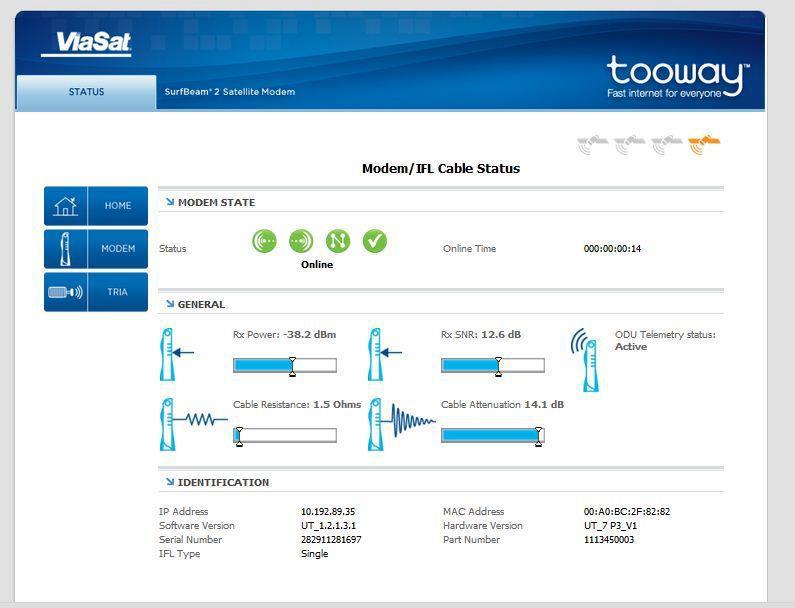
17. Once the dish is pointed as best possible, check back to your computer and notice the signal level (Rx SNR) the modem is receiving.
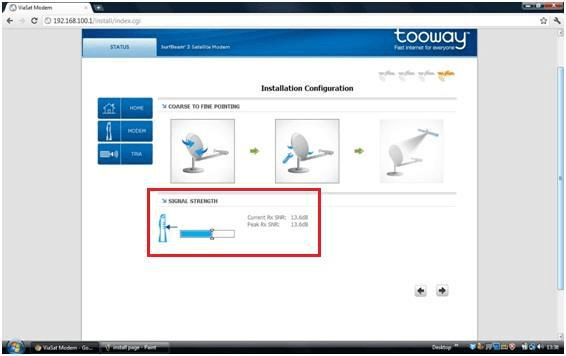
Typically, this figure needs to be about 9dB for the modem to activate, however the better signal the modem is receiving the better your future connection to the internet will be. As you can see, on our demo dish we have an Rx SNR of 13.6dB. (N.B. accepting a signal below 11.5-13dB will impact your system performance).
18. The modem must now be activated, so you now need to click on the right arrow again on the bottom right hand side of the page.
19. Clicking on this will take you back to the basic status page, and then click on the image of the modem, and you will see the modem status page as shown below:
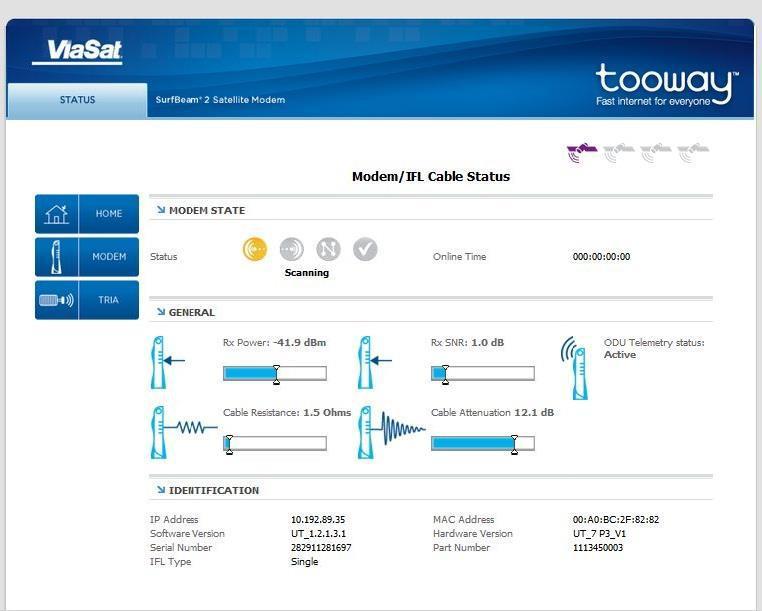
There are a few things you need to notice on this page:
Once the modem page is displayed for the first time it will change between spot beam configurations to ensure the user selected the correct spot beam for the area (see top right corner). Always make sure the modem goes back to the correct colour selected.
Make sure your cable resistance is below 3 Ohms. If your cable resistance is too high the system will not function properly.
Once the modem has again selected the correct spot beam colour it will start to synchronize with the satellite. See below:
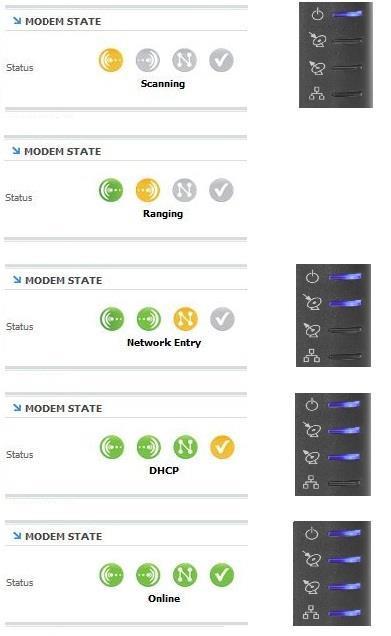
Once the modem displays as “Online” your computer will receive a new IP address from the network.
0 Comments on "VSAT Installation"